

The official Dropbox client application, at least to date, supports one and only one user account per personal computer user. This means that if a user has multiple accounts there is no official way to synchronise all Dropbox accounts under one personal computing device user account. Nevertheless, it is fairly easy and simple to activate two (or more) Dropbox accounts either on Windows or on Mac OS. In the following paragraphs there are step-by-step guides to activate a second Dropbox account on both Windows and Mac.
Multiple Dropbox clients on Mac
On a Mac this is fairly easy and straightforward. It includes only the creation of a very simple application using the Automator app included in the system. Once the Automator launches, select the creation of a new application and write a single line of code in a Run Shell Script type of automation.
HOME=$HOME/Dropbox_auxiliary /Applications/Dropbox.app/Contents/MacOS/Dropbox &>/dev/null &
The process is shown in the following figures.

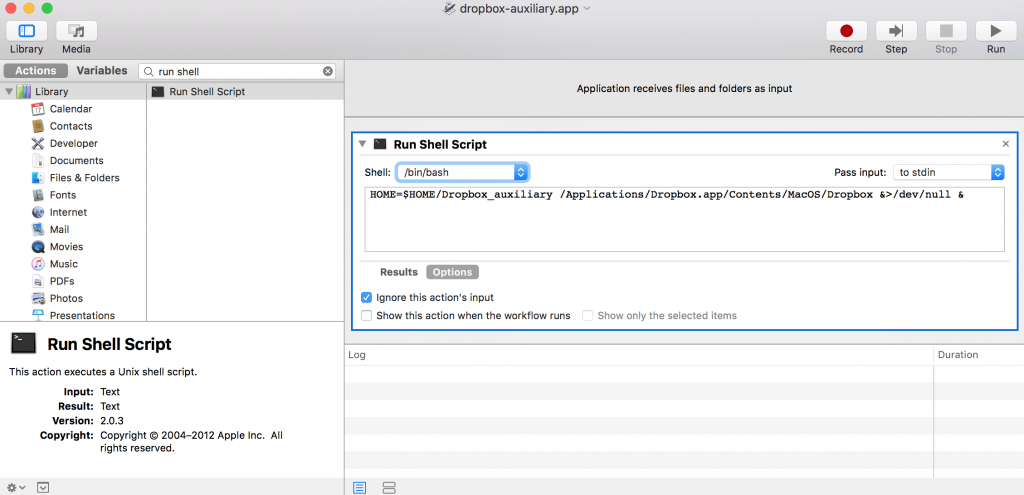
Save the application and that’s it. Once the application is launched it will require the user to login and select the folders to synchronise. Attention should be paid in the final step where the user needs to specifically define the target folder for the synchronisation. If this step is skipped then the default folder will be selected and will overwrite any other existing synchronisation folder (possibly from the first Dropbox account).
Multiple Dropbox clients on Windows
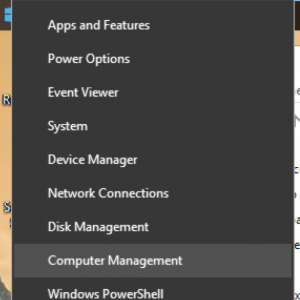
Activating a second Dropbox account on Windows is slightly more complex, since it needs the addition of another Windows user.
Ok, first things first: let’s add a new user to the system. Right click on the Start icon and select Computer management.
In the Computer management console select and open the Local Users and Groups and then the Users. Right click on the empty space in the users console and select New User…
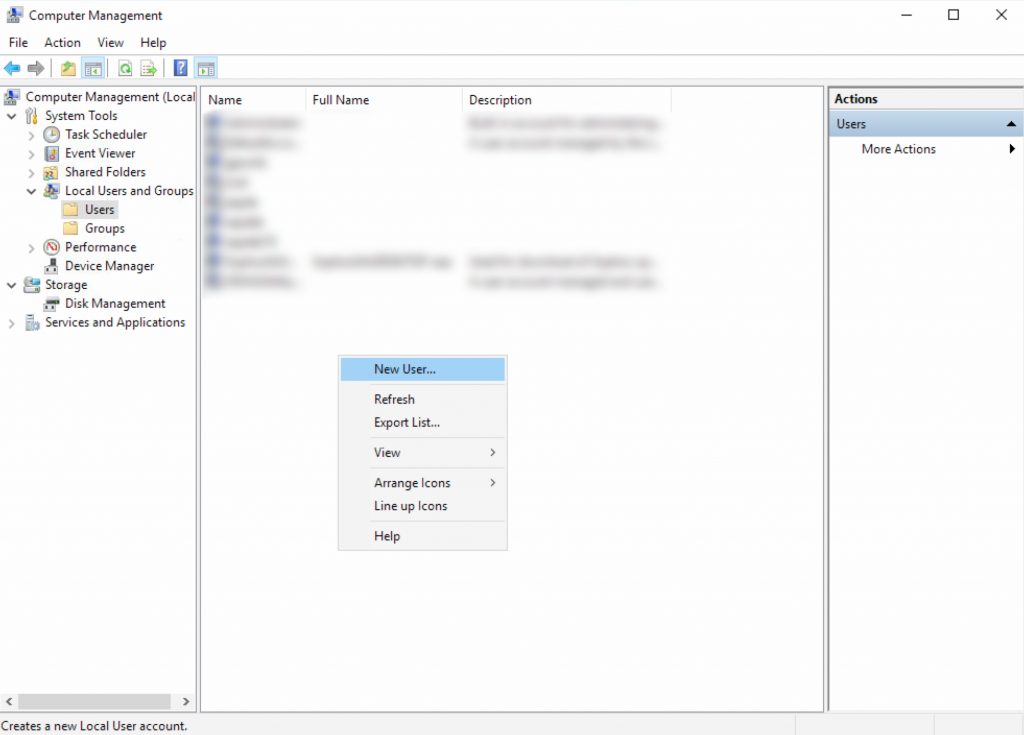
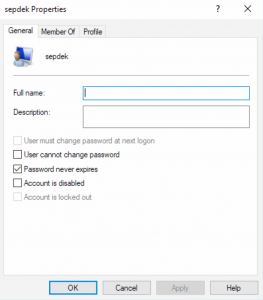
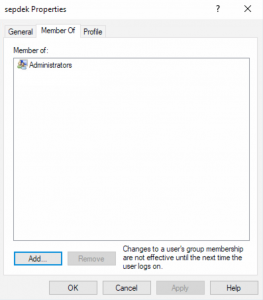
Define the new user name and password and after that right click on the new user to change the user group that user belongs.
The settings are shown in the following figures.
 |
 |
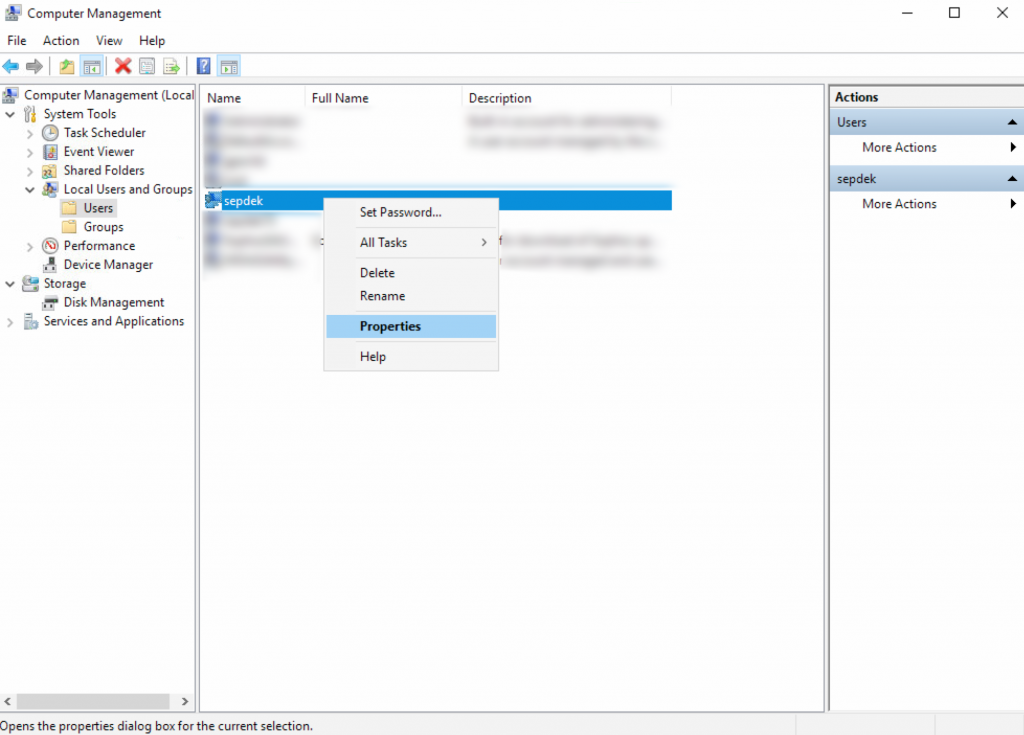
Ok, there is a new user now, in this case named “sepdek”. Next comes the definition of a new shortcut with right mouse click on a folder, in this example on the desktop.
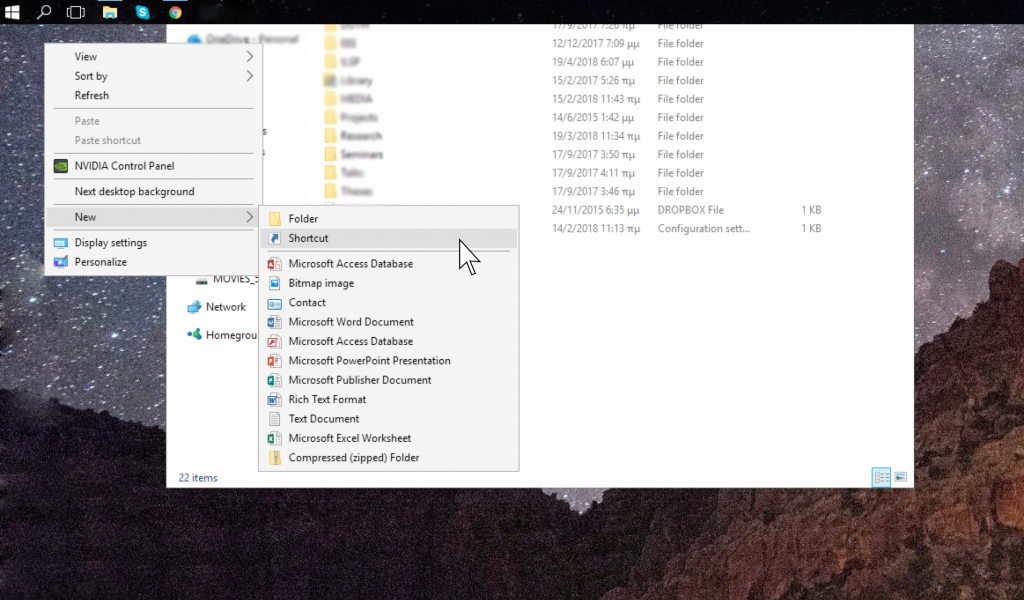
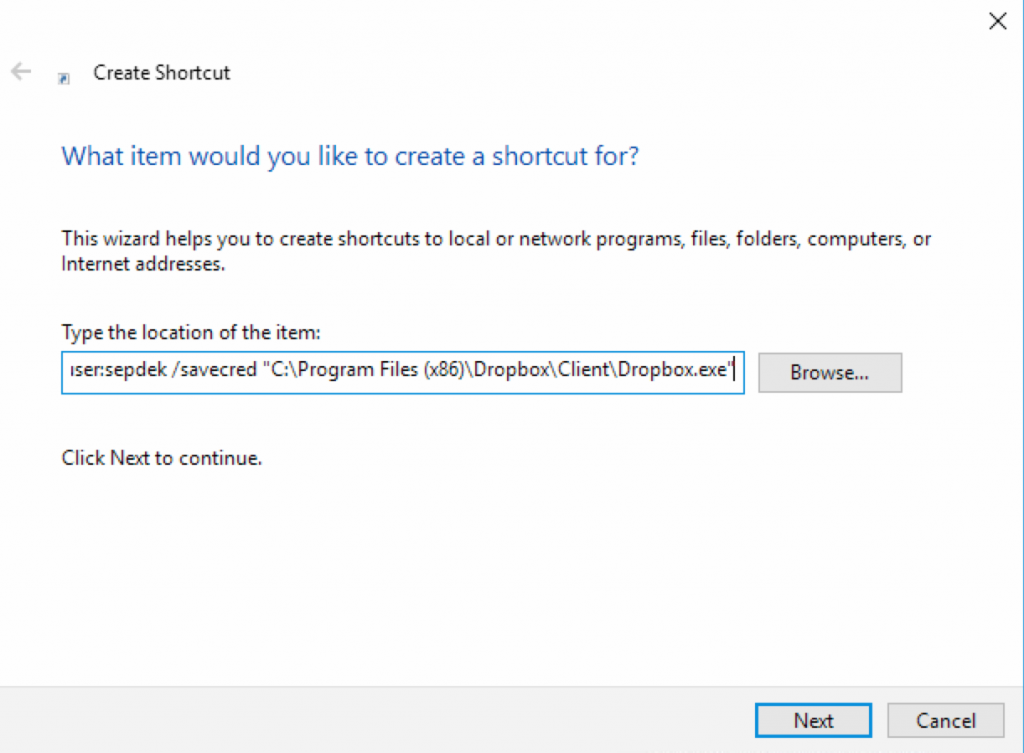
In the shortcut properties type in a command like the following
C:\Windows\System32\runas.exe /user:sepdek /savecred "C:\Program Files (x86)\Dropbox\Client\Dropbox.exe"
as shown in the following figure. Attention to the correct username (here is sepdek, but it can be any username defined by any user).
Final step is the definition of the shortcut name

Once this shortcut is executed, a second Dropbox client is activated which asks for the usual user login for the synchronisation. Again, as in the case of Mac OS, special attention should be paid in the final step where the user needs to specifically define the target folder for the synchronisation. As in the previous case, if this step is skipped then the default folder will be selected and will overwrite any other existing synchronisation folder (possibly from the first Dropbox account).
