
Recently I have been experimenting with MIT app inventor 2 on the Web to check the development cycle and production time. It turns out that the platform is extremely productive and offers numerous features for Android app development.
In a day I have been able to develop a relatively simple app and in two hours I have produced a second version (had to include some error control).
THE APP SCENARIO
The app reads JSON data from a web server (user’s choice) and presents them in a typical listview. Each item in the list is clickable and activates a secondary screen with detailed info and social sharing functionality. This app scenario can be applied in numerous cases where various data or measurements are online and need to be presented in mobile devices.
THE CASE STUDY
The case study for this app development was eHealth. I have already developed an eHealth app for iOS (take a look here) and I wanted to see how this app could be developed for Android.
THE DEVELOPMENT PLATFORM
I have been experimenting with Android development for some years and I had to stick with the typical Eclipse-Andoid SDK solution. I did not yet had the time to experiment with the MIT app inventor platform so since the 2nd version has been made available this was a good time to do it. The rest of this post includes details on how to develop an app with the specified scenario on the app inventor 2 platform and publish it easily on Google Play Store.
HERE GOES
Lets suppose we have an app inventor account and we are already logged in.
We create a new project and give a name.
What we need for our application scenario is 2 screens. One for a listview (master) and one for the details. Lets start by developing Screen1 as is the master screen named by default.
Here is a complete view of the master screen and the components included:
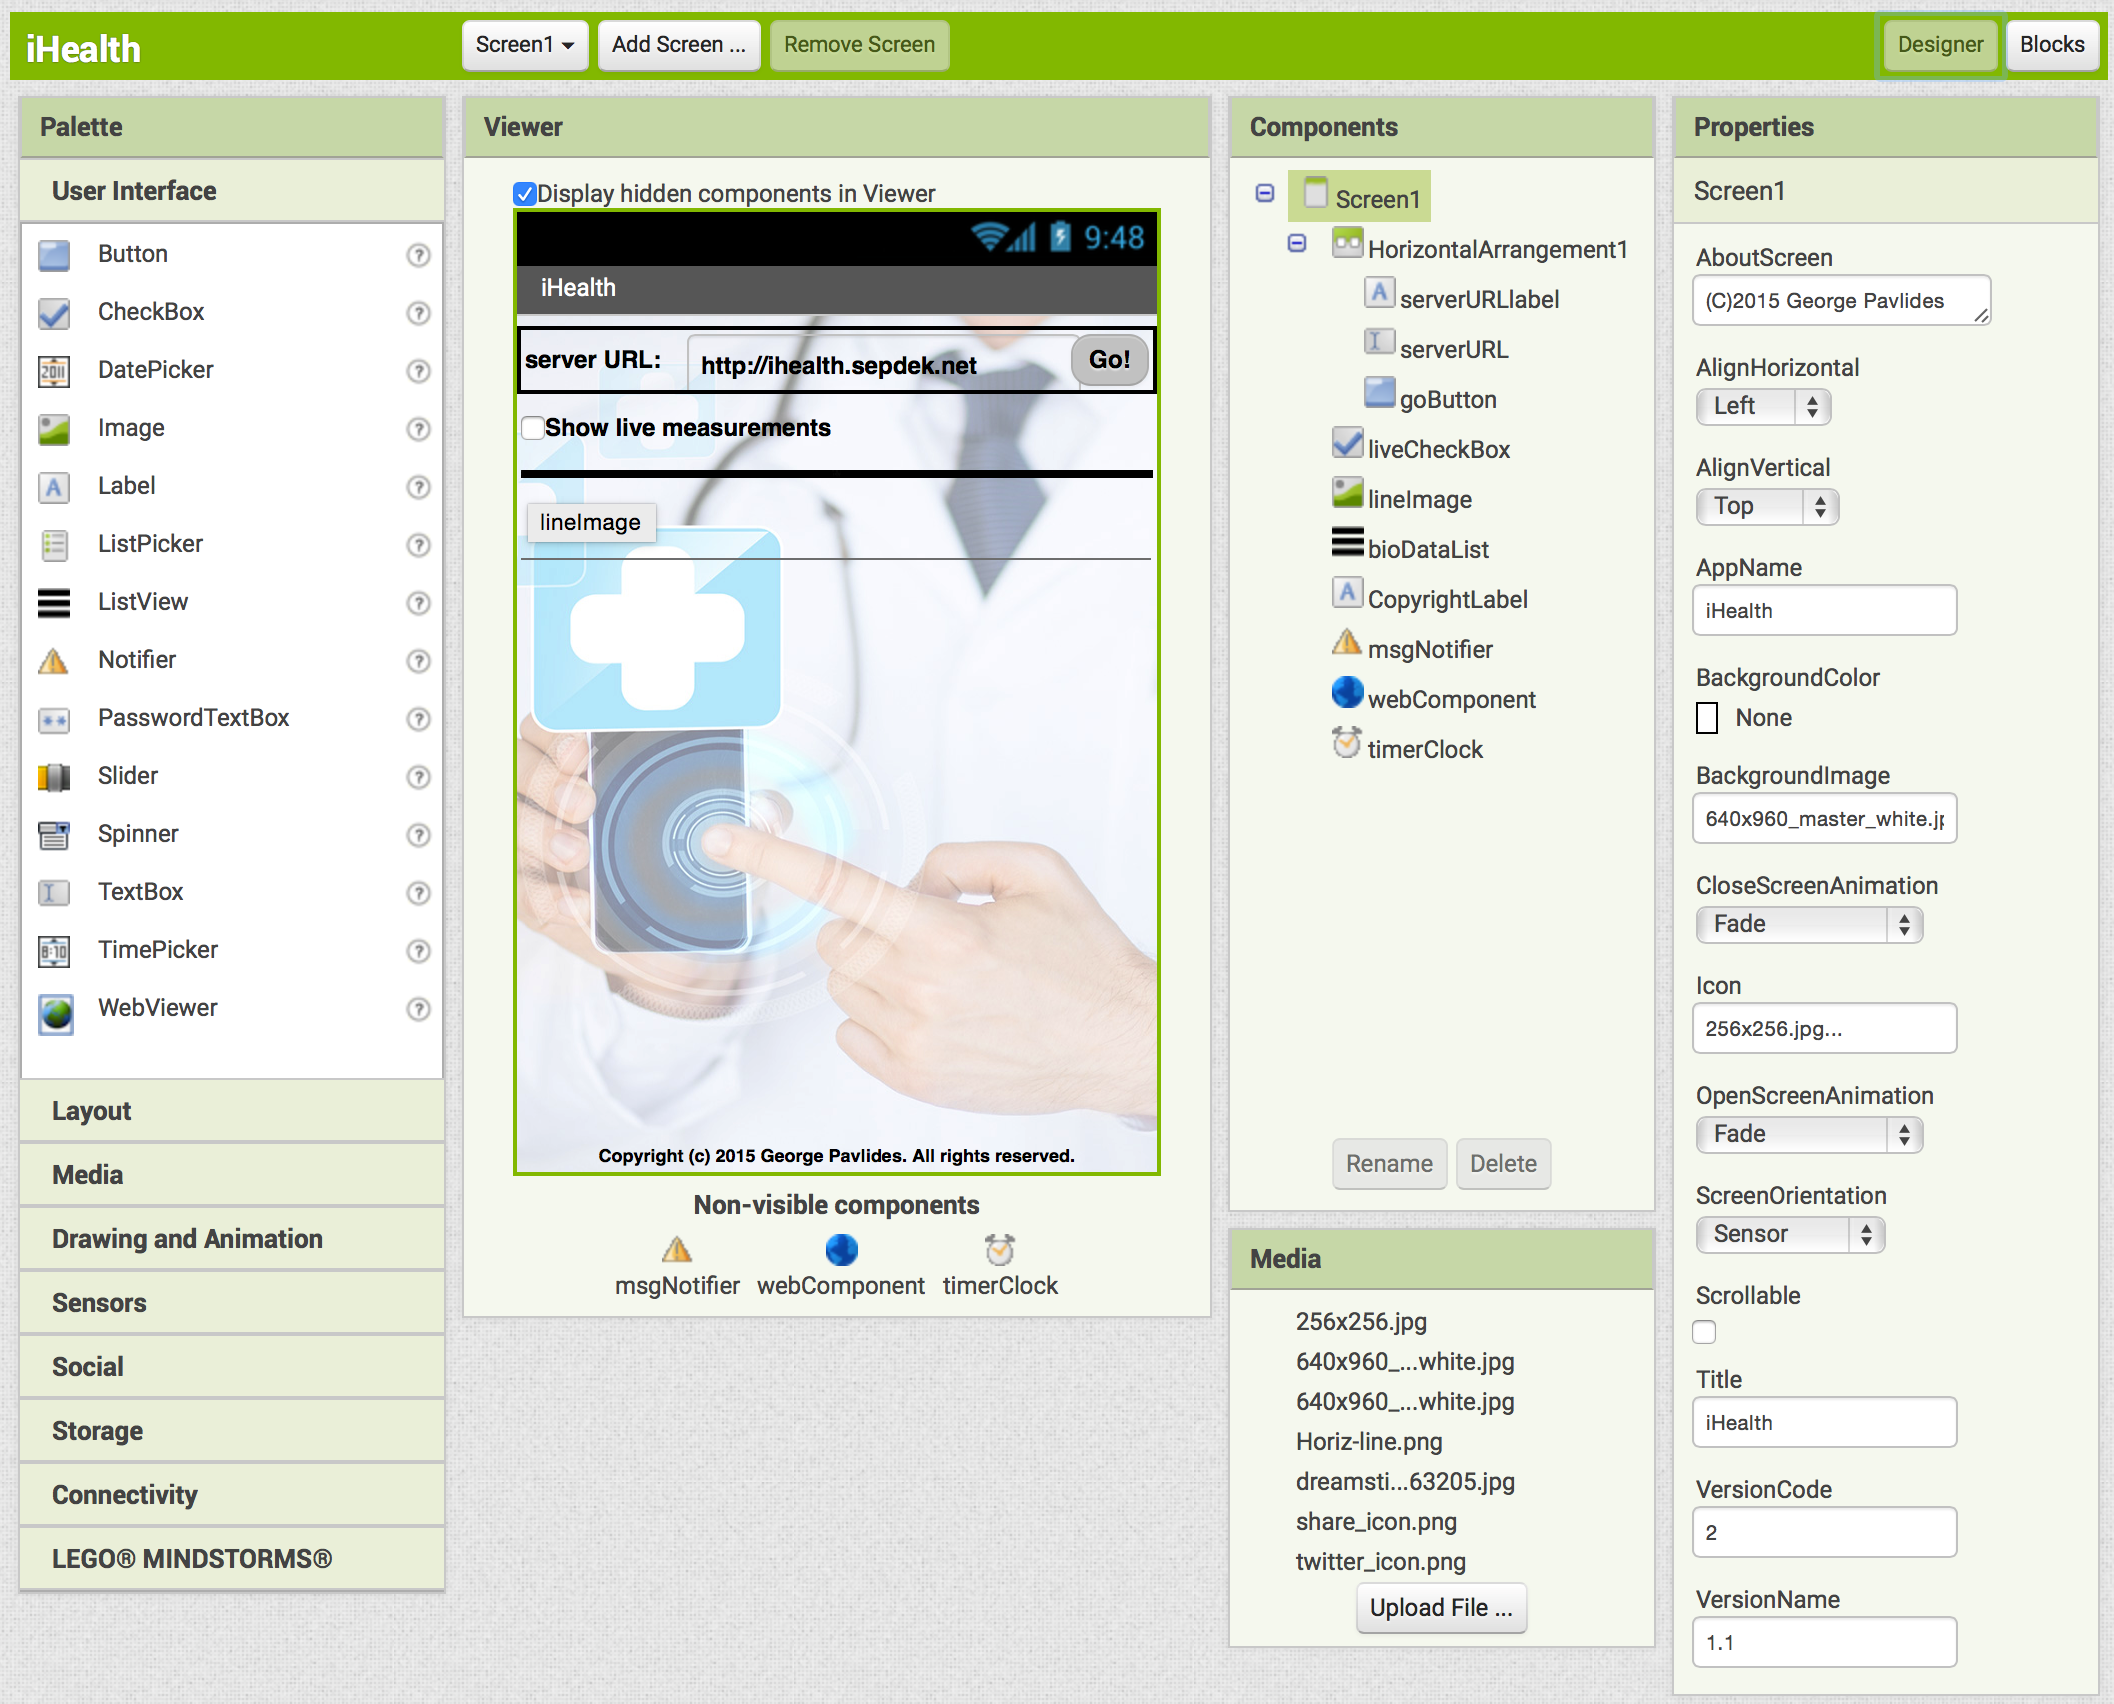
The interface is a typical visual programming interface with Components and Properties and is extremely easy and intuitive, so there is no need to explain anything more here. All components have been dragged-dropped from the Palette on the left side under the tabs “User Interface”, “Layout” and “Connectivity”.
Moving to the Blocks section (top-right screen button) we are able to do the actual programming using the Scratch Programming paradigm.
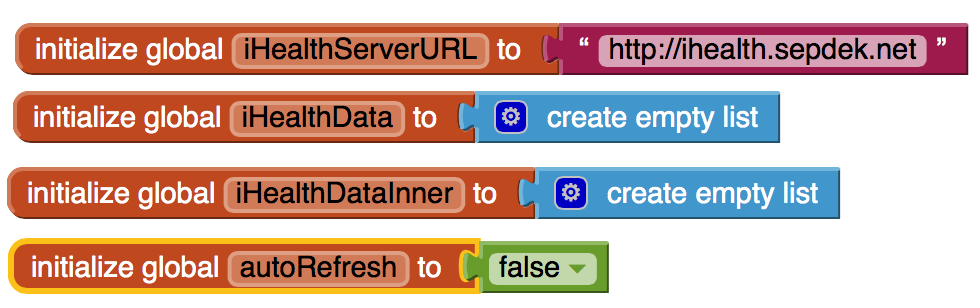
First of all we have to define some Global Variables for easy access throughout the app:
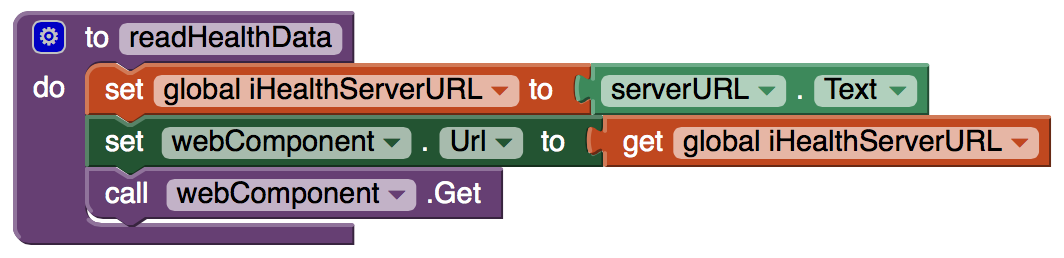
Then we move on to define the main app procedure, what we need our app to do:
Ok we are now done with this simple app and we just need to define what goes on in various cases that something happens, i.e. to handle the events in this app.
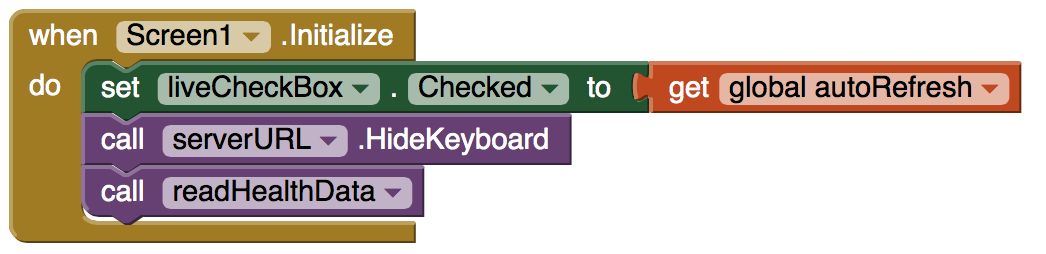
First we need to define what happens when the app loads:
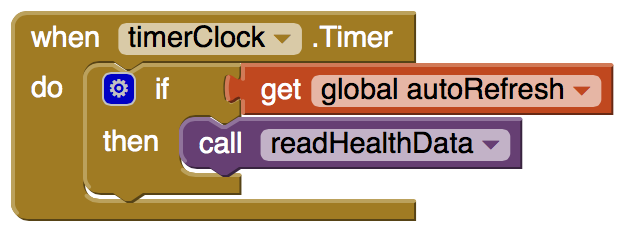
Then we define that at each Timer tick we want to check new JSON data from the server in case the user needs to get live feed of the data:
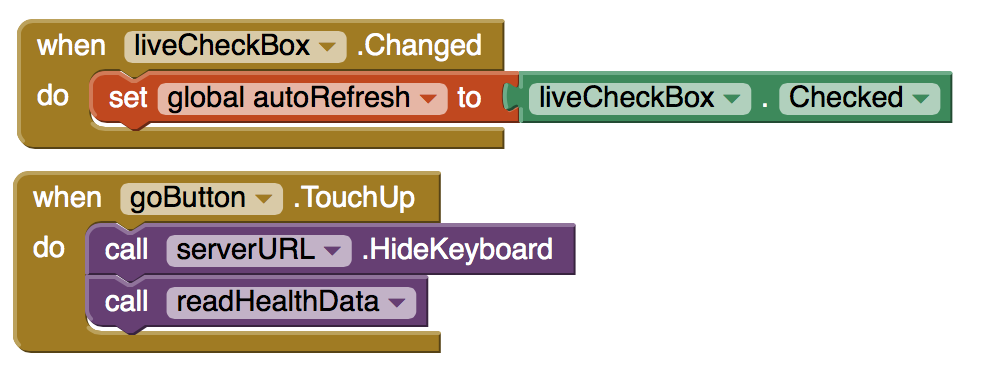
In addition, we have to define what happens when the user uses the controls (the Go button and the live checkbox):
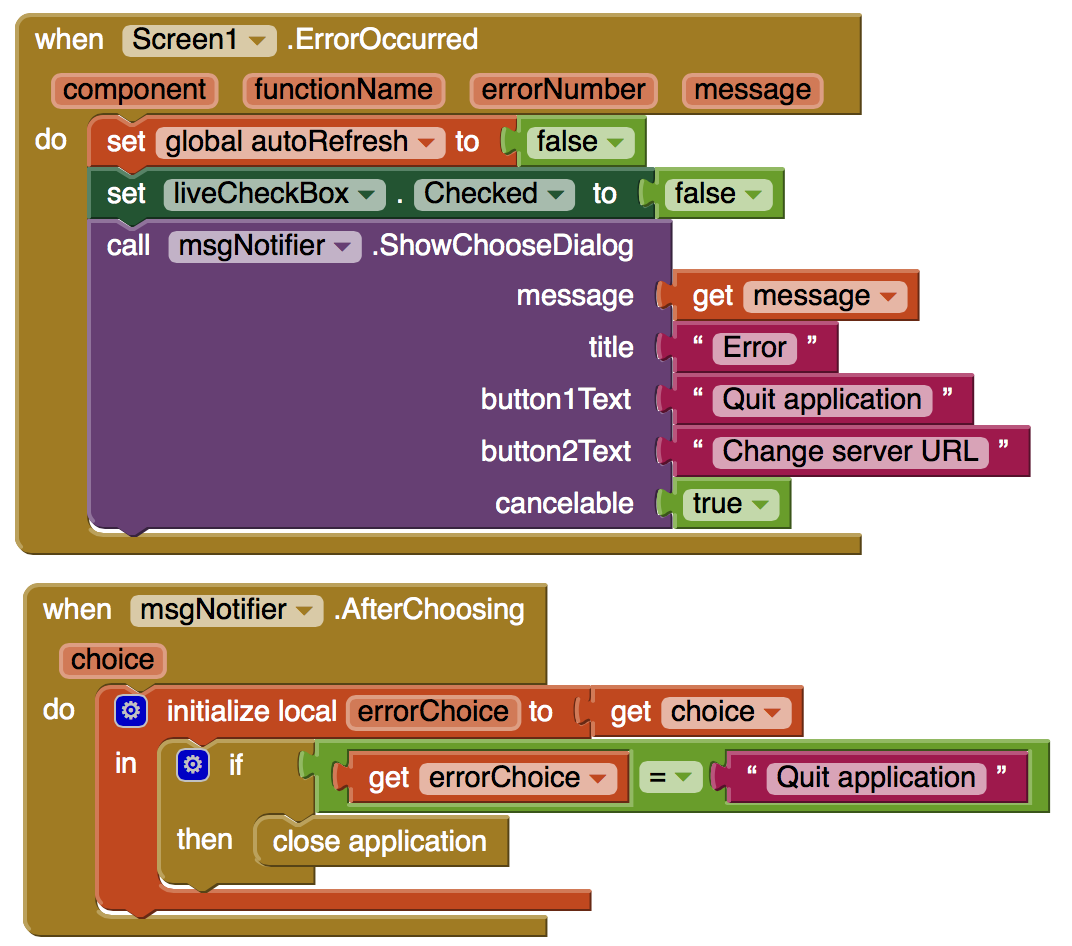
Two more things need to be defined: what happens in case of errors, and what happens in case the user clicks on a list item:
![]()
It should be noted that the Detail Screen (the 2nd screen in this project) has already been defined and named as “DetailScreen”.
The final touch is to program what happens when the app receives JSON data from the server and how the listView is actually populated:
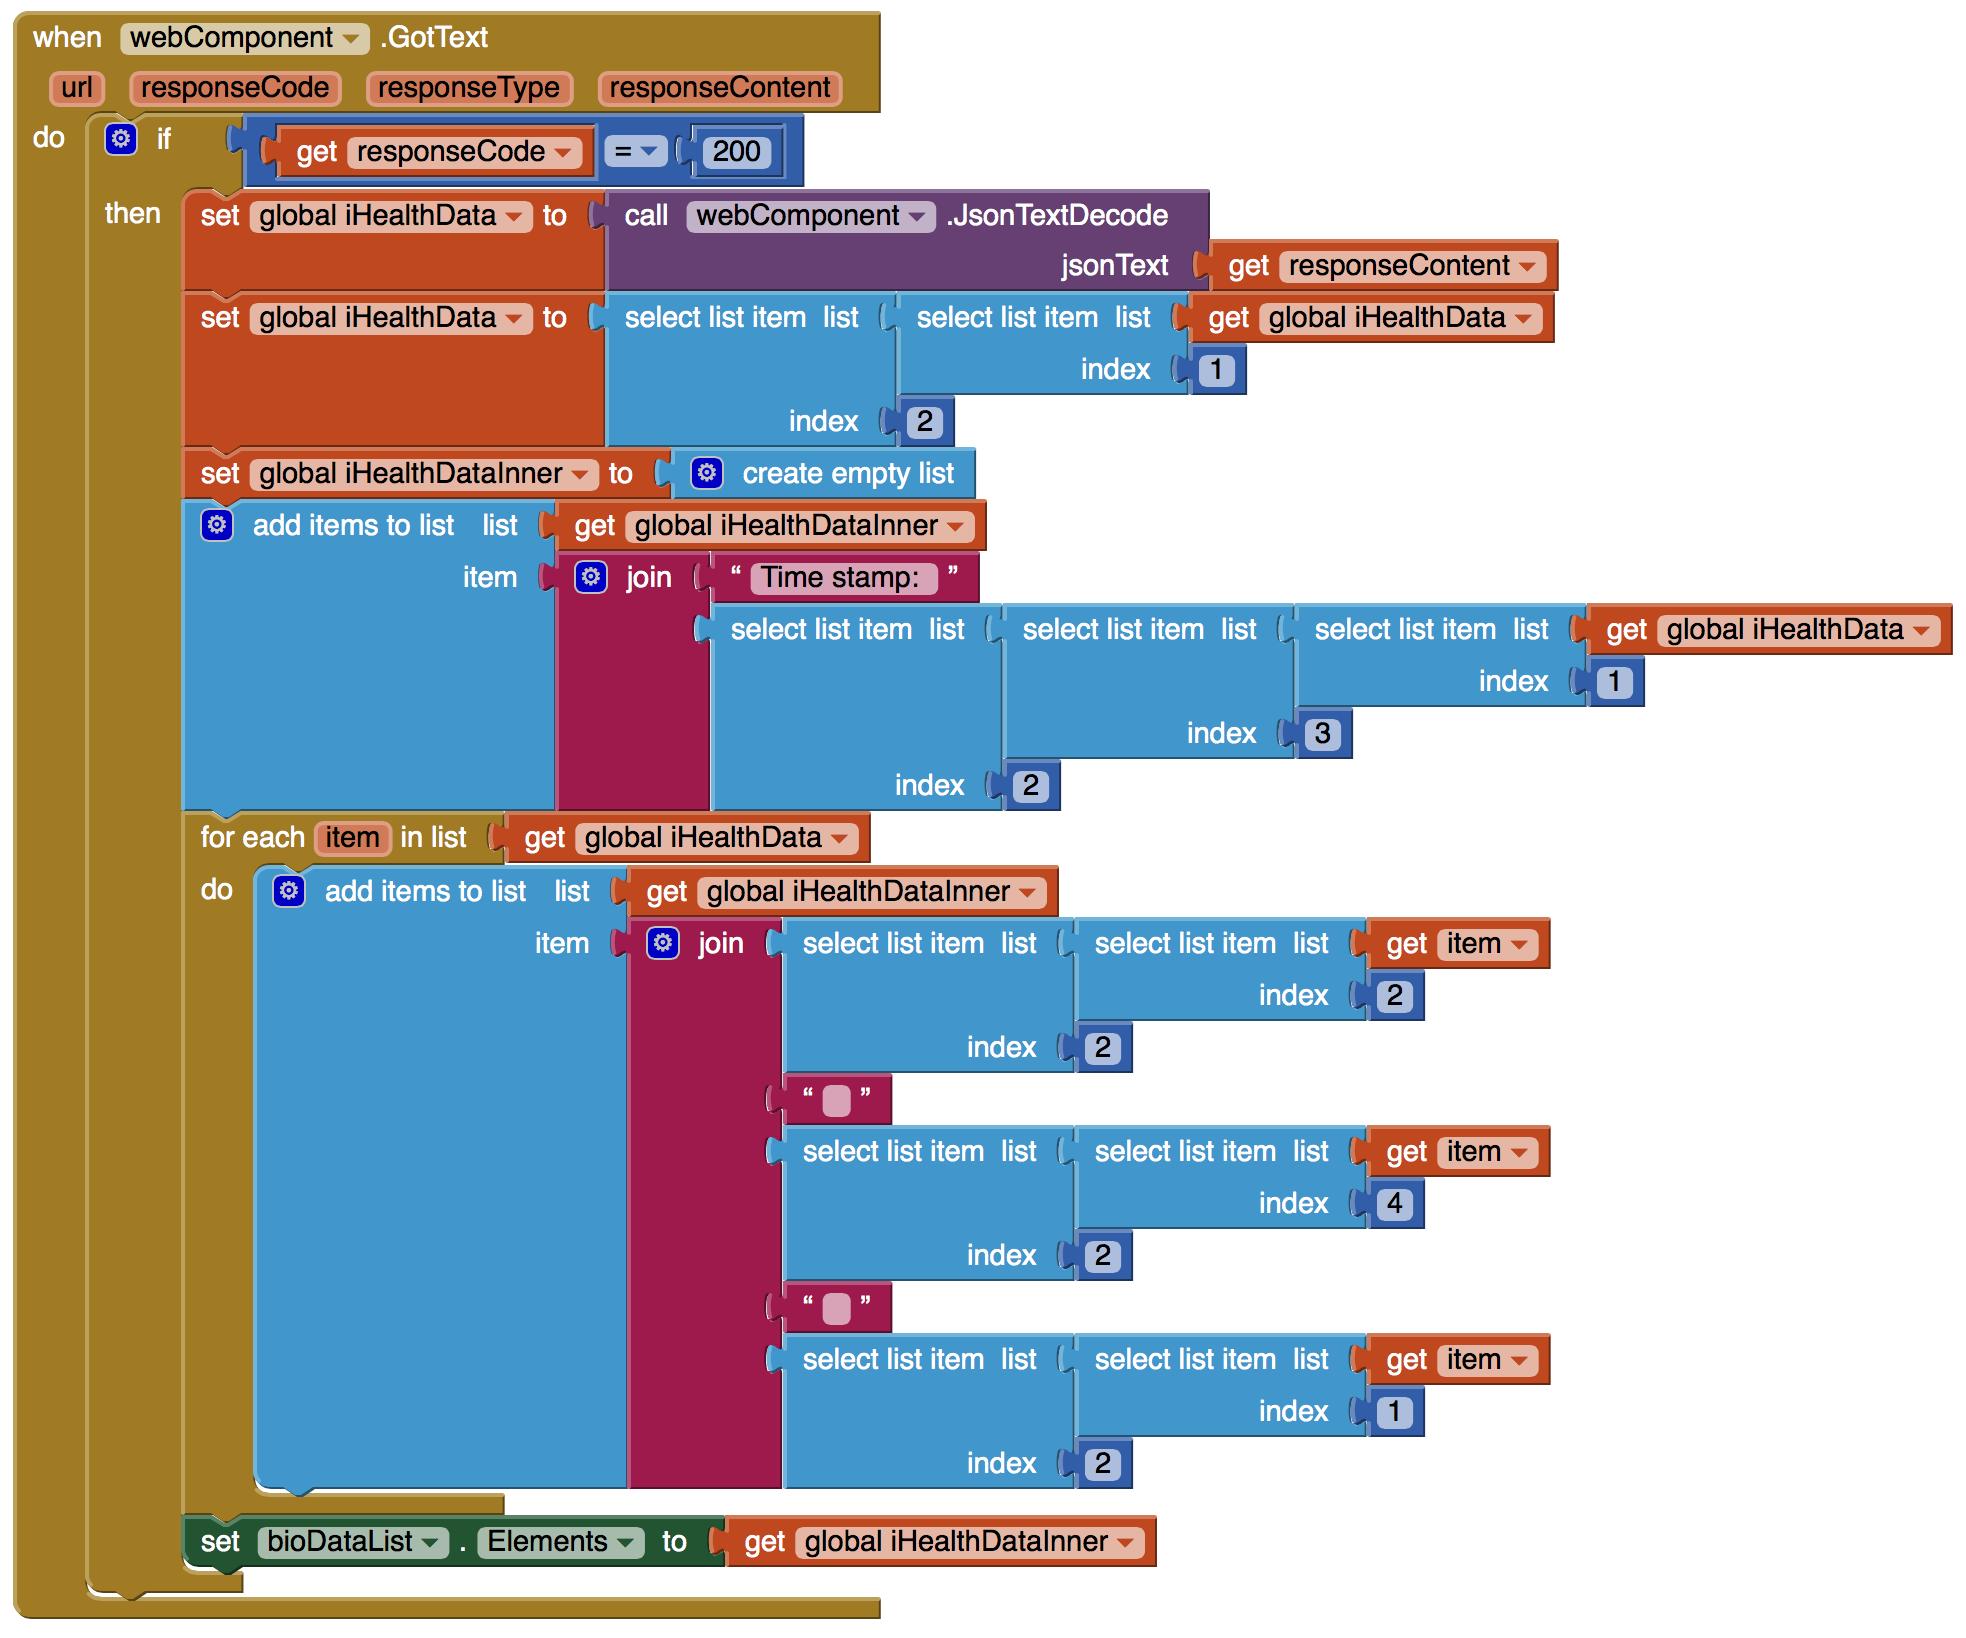
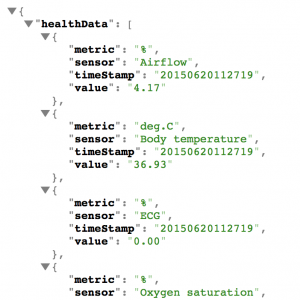
It should also be noted that the JSON parsing algorithm presented in the previous figure is valid only for JSON data in the form shown in the following figure and should be carefully changed in other cases:
This concludes the Master Screen named “Screen1”.
We then move to develop the Detail Screen named here “DetailScreen”.
Here is a complete view of the master screen and the components included:

Again, there is no need to go into detail, since the Properties are more than obvious. Only one explanation that the “Share” and “Tweet” images are typical Buttons with their face changed using images.
Lets move to the “Blocks” section, again and take a look at the programming.
Here is the definition of Global Variables and the main Procedures:
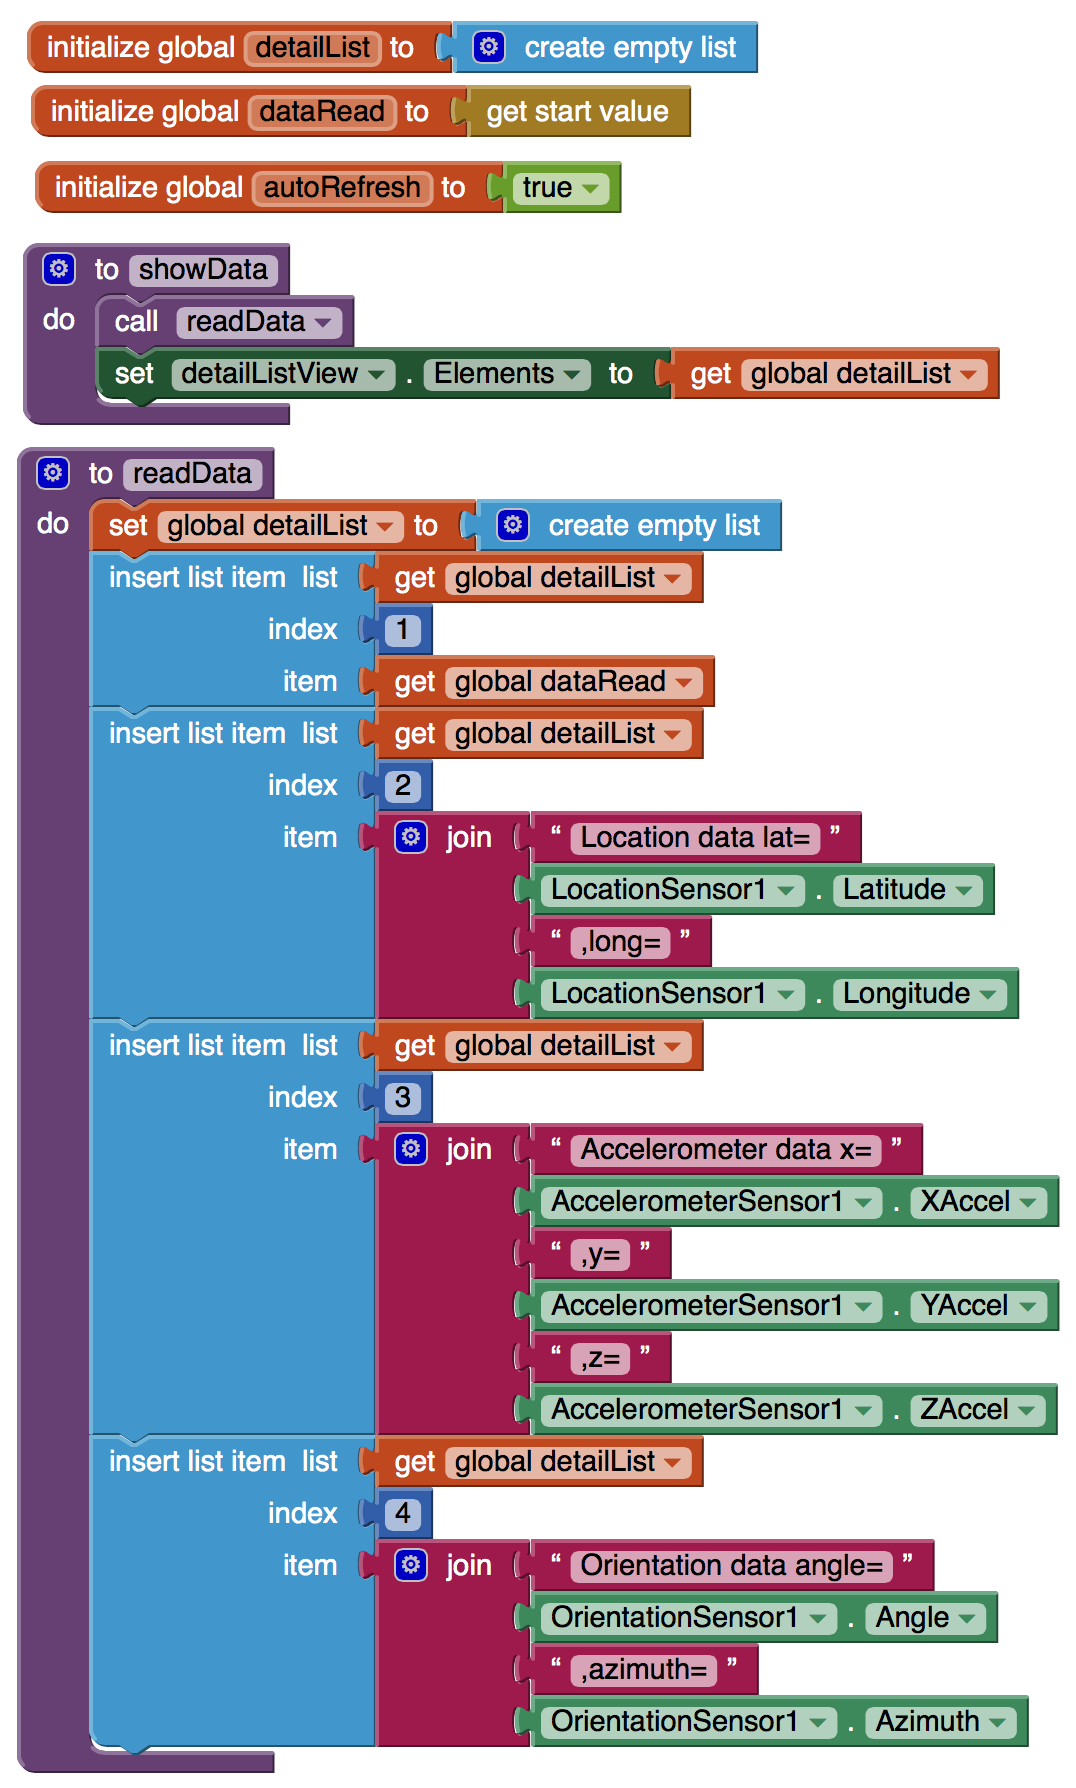
It should be noted that the “get start value” Component is what the Master Screen passes to this Screen, and the the main Procedure creates a simple listView with the passed data from Master Screen and some additional data (here just some mobile device sensor data for reference).
Here are the Screen initialization methods, including what happens when the user requires to return to the Master Screen (presses “back”):
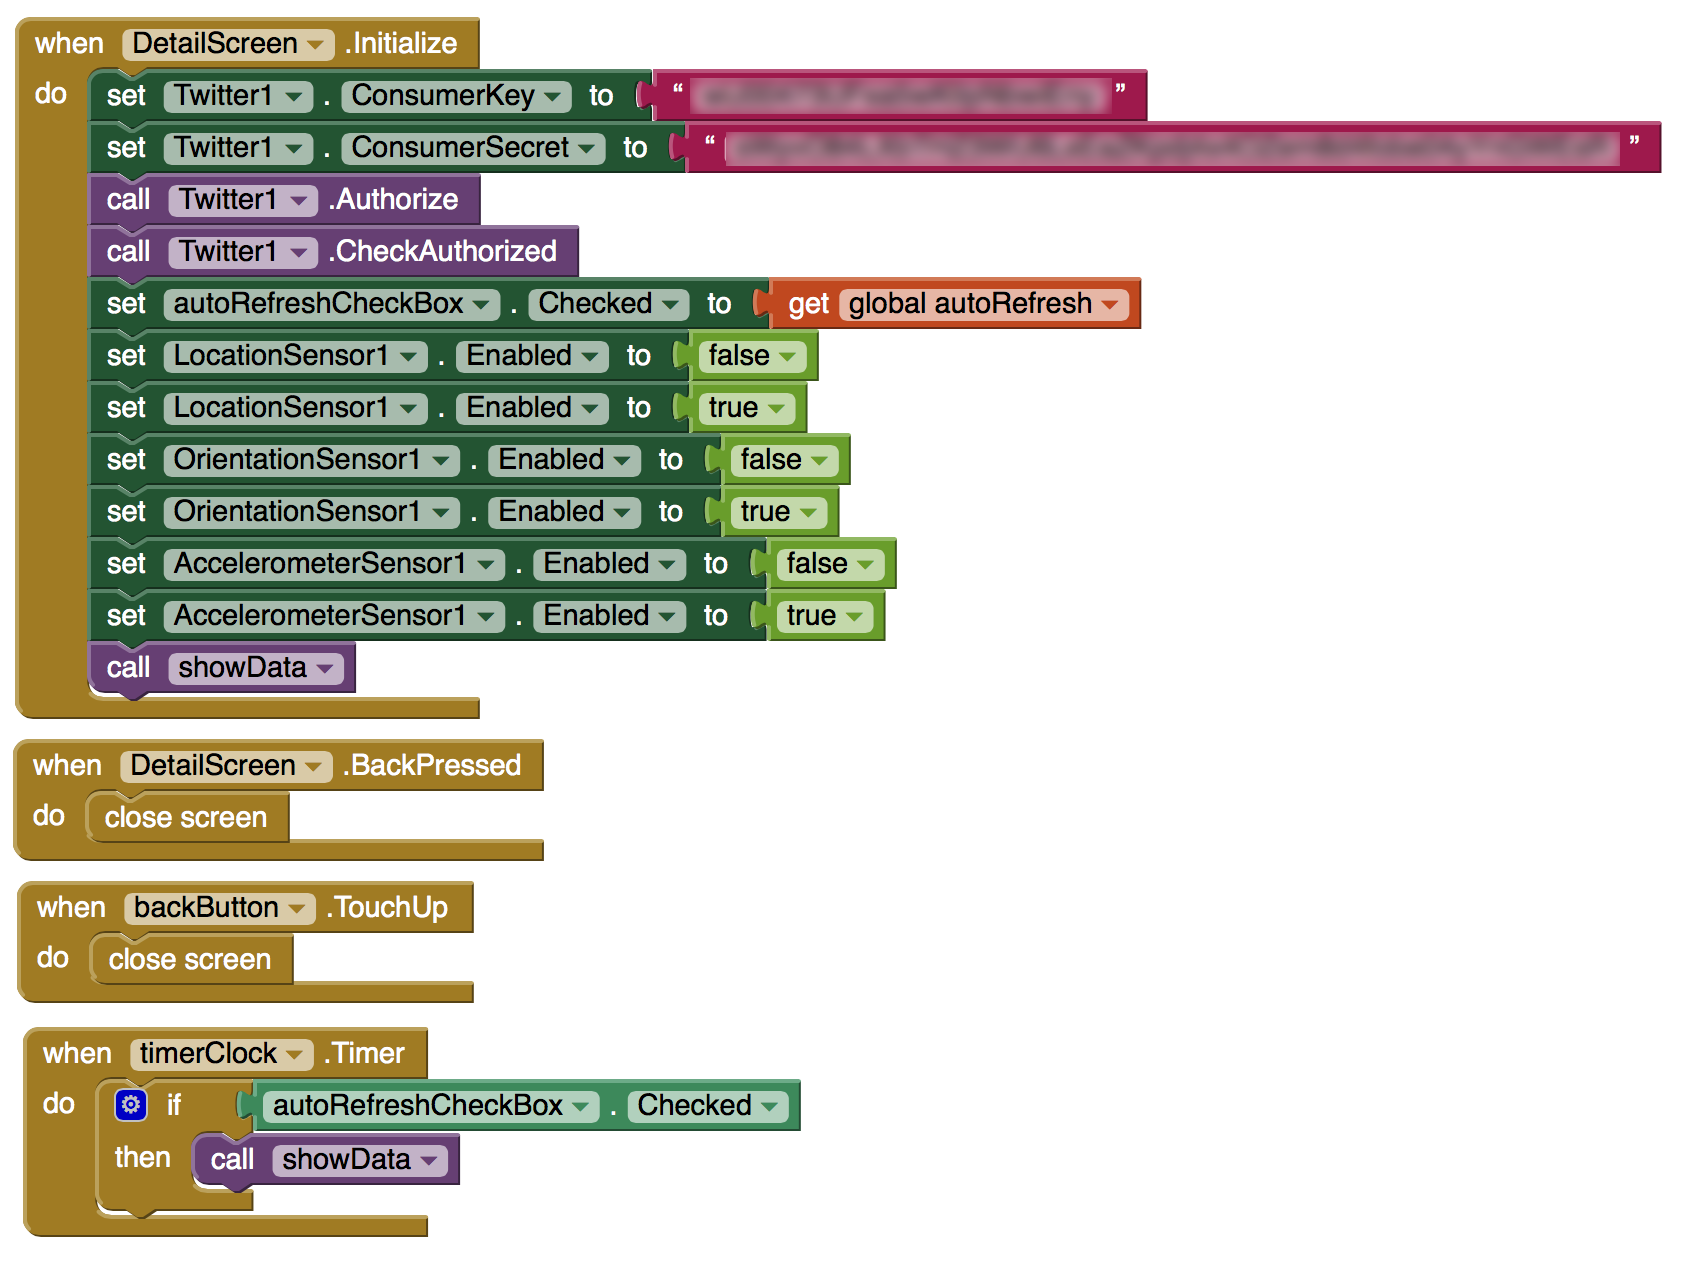
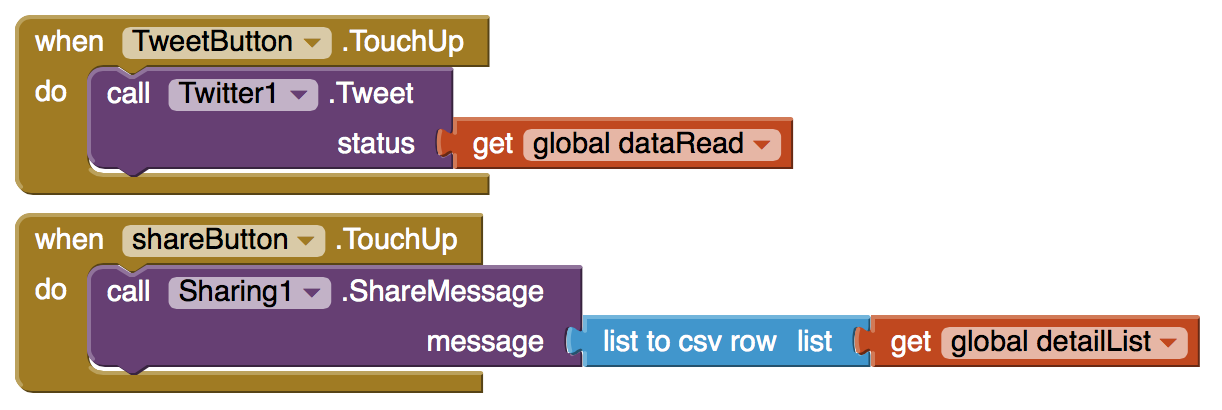
Please note that the CustomerKey and CustomerSecret are to be defined by each developer.
Here are the Social Media methods:
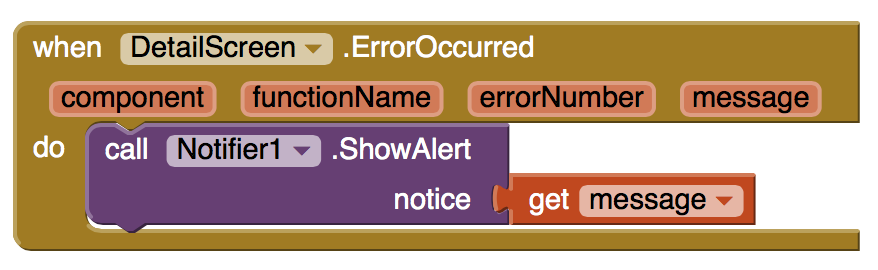
And finally a simple error handling method:
THE OUTCOME
The app is available on Google Play Store. I have uploaded the complete App Inventor project on Github, so you may take a look at it…
THE TESTING
The tests on my Android phone have been made significantly simple through the use of the AirDroid web interface.
